Jarvis Bamboo Standing Desk
When I got my recently acquired iMac, I got a sit/stand desk to go with it. I spend a lot of time at my desk and while I knew it wouldn’t be cheap, it seemed like a good investment in my comfort and health.
I have used a standing desk in the past, at a former workplace. In that case, the desk was standing only.1 What I wanted was an adjustable sit/stand desk that I could switch back and forth.
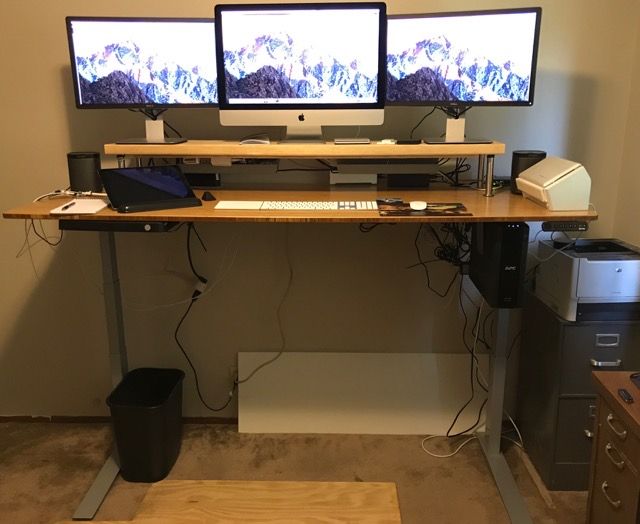
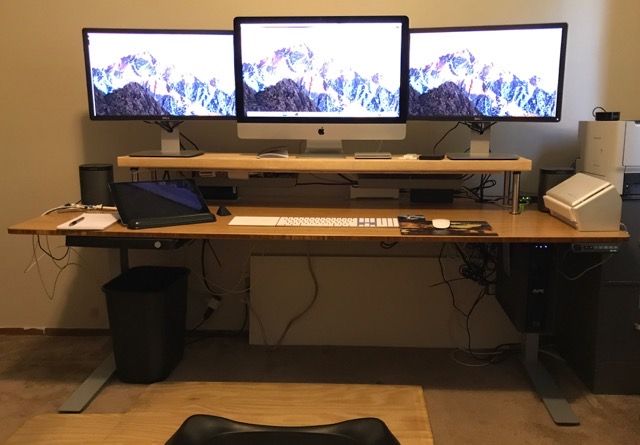
The desk I bought is a Jarvis Bamboo from fully.com, based on The Wirecutter’s recommendation. They offer the Jarvis Bamboo in a variety of sizes. I got the largest one to accommodate my three-monitor setup: 78”x30”. This is only slightly larger than my old desk and “printer stand”2 so despite the size I didn’t have to move much furniture to accommodate it.
There are two options for the adjustable height, one that adjusts from 27.25” to 46.5” and an extended range version that goes from 24.5” to 50”. I’m 6’5”, so the extended range version was a must for me, but I think that even those who are not at one extreme or the other height wise should consider it. At 30” wide this desk would be too wide to fit through some doors, including the relatively narrow door to my office. Before I got the desk I was concerned that when it was time to move I would have to disassemble the desk to get it out. Once I got it, however, I realized that if I lower it all the way down it’s actually shorter than it is wide, so I could flip it on it’s side and get it out that way. So when considering how much height adjustability you need, take a look at how wide your office door is in addition to how tall you are.
One upgrade that was well worth the price is the programmable memory controller. Rather than having to stand there pushing the up button while the desk rises, then bumping it up and down until I hit the height I want, I can just program my sitting and standing heights and switch between them with a single button press. It can memorize up to four options, so you could have sitting and standing heights for two different people.
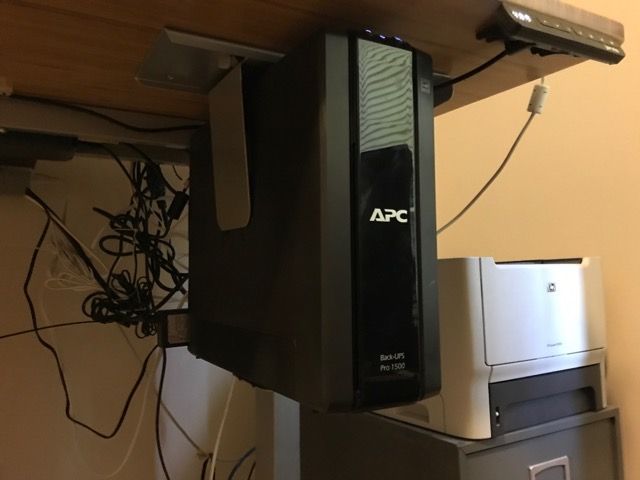
I bought a big, beefy Uninterruptible Power Supply (UPS) along with my new iMac, and I wanted to have that on the desk, rather than having a bunch of power cables going up and down every time I changed the desk height. I could have just put it on top of the desk, but fully.com offers CPU Holders that attach to the bottom of the desk surface and hold mini-tower PCs. The APC UPS that I bought is about the same size as a mini-tower, so I got one of the CPU holders and mounted it underneath the desk (the UPS is heavy enough to require their heavy duty CPU holder).
I also picked up some cable trays and a neat swiveling pencil tray to hold pens and post-it notes, since I’m giving up my desk drawer.
One must-have with a standing desk is some sort of padded floor mat. When I was running a standing desk at work I just used a cheap one from Walmart, but fully.com offers an interesting option: the the Topo Anti-Fatigue Mat. It’s contoured with an angled lip around the edges and a bump in the middle to encourage you not to just stand there flat footed. They give a big discount for ordering it with a standing desk, so I picked one up. I think I like it so far, though I have almost tripped a couple of times when stepping back from the desk.
The Jarvis Bamboo comes disassembled in two heavy boxes; one for the desktop and one for the frame. Get someone to help you carry them if you can.
The desktop has holes pre-drilled for the legs and frame rails and those went in pretty easy. I should have pre-drilled some holes for the CPU holder and pencil tray, but I was afraid of overdrilling and coming out the desktop. It would have saved me several stripped screws. Other than that it went together pretty easy, with clear instructions. A power screwdriver with quite a bit of torque is definitely helpful. I had to hand tighten some of the frame screws, even with the pre-drilled holes.
I like my monitors fairly high for good ergonomics, whether I’m sitting or standing. Fully.com offers monitor arms with their desks, which would work with the VESA mounts in my two Dell monitors, but not my iMac.3 Instead I decided to go with a riser shelf like I had on my previous desk. I spent a ton of time looking for something pre-made, but there was nothing out there tall enough or wide enough. All the commercially available monitor risers are designed to raise the monitor a few inches, which is nowhere near enough for my height. I ended up getting a 2x12 at Home Depot and having them cut it to 60”, and attaching a set of legs from Ikea. This worked out rather nicely, and while unfinished lumber is a bit low rent it doesn’t clash with the bamboo desktop too badly.

Overall I’m very happy with the new desk. It does a great job with my three-monitor array and the big work surface is super useful (as long as I keep it clean and uncluttered). Being able to switch between sitting and standing lends a lot of variety and I certainly feel better after working at my desk for a long time. The new desk is so much nicer than my setup at work it’s inspired me to arrange to work from home one day a week.
- Really, it was just an Ikea end table on top of a regular desk as my keyboard and mouse surface with the monitor on top of the desk’s hutch, which put it at eye level for me. ↩
- Not actually used for my printer. That lives on an adjacent file cabinet. ↩
- Apple does sell a version of the iMac with a VESA mount, but that’s not what I’ve got. ↩